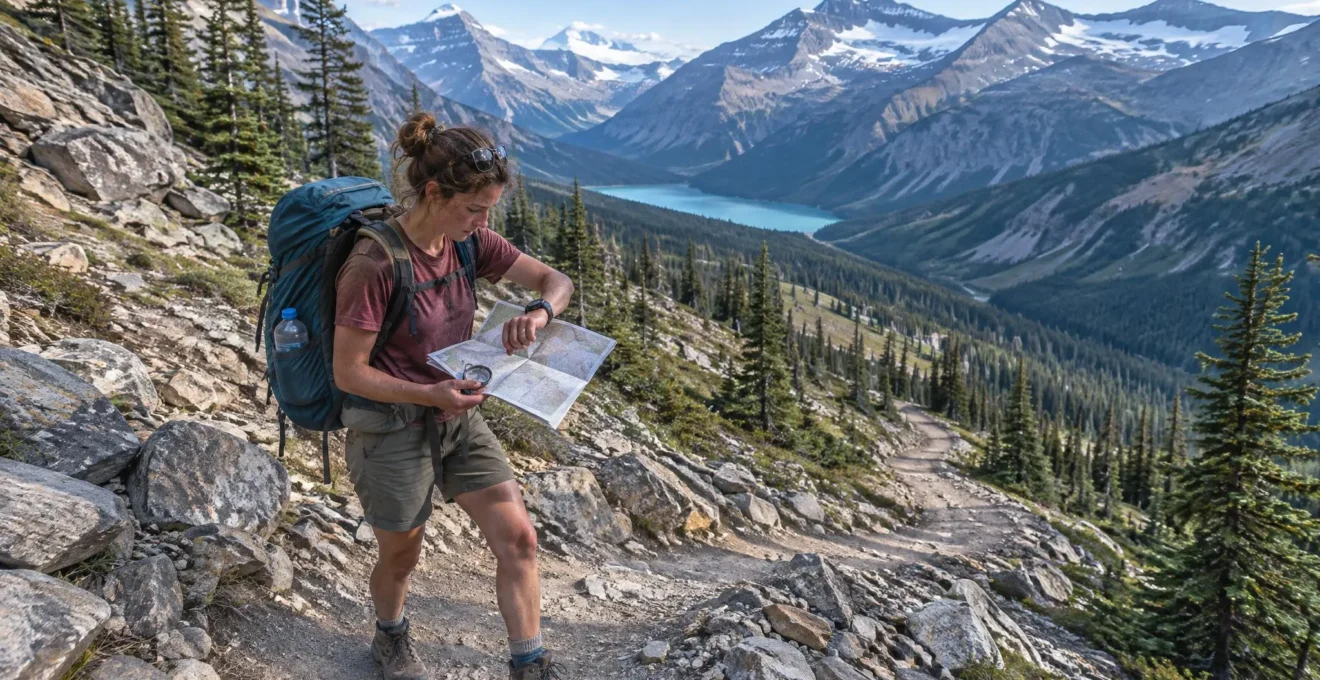
A safe hiking trip in Canada starts with matching the trail to your abilities, checking current conditions, and planning how to return before daylight, weather or fatigue becomes a problem. Distance alone is not enough: elevation gain, trail surfaces, remoteness and navigation requirements can completely change the demands of a hike.
Canada offers remarkably different hiking environments. A lakeside path in Ontario may involve predictable footing and modest elevation changes, while a shorter route in the Rocky Mountains can feature loose rock, steep slopes and sudden weather changes. Coastal trails in British Columbia may introduce slippery roots and tidal considerations, while northern routes can require greater self-sufficiency because help and communication services are limited.
Whether you’re preparing for your first day hike, planning a national park camping stay or progressing toward a multi-day wilderness trip, the safest approach is to evaluate the entire experience rather than focusing on the destination. That means understanding your limits, choosing appropriate equipment, establishing clear turnaround decisions and leaving room for unexpected conditions.
Safe hiking in Canada: The essentials
- Assess difficulty beyond distance: Compare elevation gain, steepness, footing, exposure and navigation requirements with your actual experience.
- Plan the return before departure: Check forecasts and trail advisories, carry essential equipment, establish a turnaround time and share your itinerary.
- Progress gradually: Begin with manageable day hikes and accessible camping experiences before attempting remote or multi-day routes.
- Why Can a Short Hiking Trail Be Harder Than a Much Longer One?
- How Can You Choose a Hiking Trail That Matches Your Fitness and Experience?
- Day Hike or Overnight Trip: Which Is Better for Your Next Adventure?
- Why Can Late Starts Become Dangerous on Remote Hiking Trails?
- When Should You Turn Back During a Hike — and How to Decide Before It Becomes an Emergency?
- How Can First-Time Campers Prepare for a National Park Stay (Camping as Part of a Hiking Trip)?
- Rent or Buy Your Hiking Gear: Which Is Better for Your First Seasons?
- How Can You Plan a Successful Multi-Day Hiking and Camping Trip in Canada’s National Parks?
Why Can a Short Hiking Trail Be Harder Than a Much Longer One?
A short hiking trail can be harder than a longer one because elevation gain, steepness, unstable surfaces and technical obstacles increase physical and navigational demands. A three-kilometre mountain route with sustained climbing may require more effort and experience than a ten-kilometre flat trail. Distance tells you how far you’ll travel, not how difficult that travel will be.
Consider two hypothetical Canadian hikes. The first covers 3 km of steep alpine terrain in Alberta, climbing 450 metres over loose rock. The second follows a 10 km relatively level lakeside route in Ontario. Although the alpine hike is considerably shorter, its sustained ascent and challenging footing could make it more exhausting and slower for an inexperienced hiker.
Elevation gain per kilometre provides a useful starting point for comparison. Divide the total elevation gained, in metres, by the trail distance, in kilometres. In the hypothetical alpine example, 450 metres divided by 3 km gives an average of 150 metres gained per kilometre.
This figure is a comparison tool, not a universal difficulty threshold. It also does not reveal whether the climbing is gradual or concentrated in a particularly steep section. On an out-and-back route, make sure you understand whether published distance and elevation figures describe the entire journey or only the ascent.
According to Parks Canada’s trail ratings and descriptions, trail difficulty reflects characteristics such as elevation changes, grade, surfaces, obstacles and required experience. Its classifications range from Easy through Moderate and Difficult to Route, with the last category requiring exceptional hiking and navigation experience.
Trail surfaces create another important distinction. Wet roots on coastal forest paths can reduce traction, scree slopes demand careful foot placement, and exposed ridgelines introduce consequences that do not appear in distance measurements. Switchbacks may moderate the gradient, but they do not eliminate the overall climb.
Technical difficulty is not the same as cardiovascular difficulty. A short route involving scrambling, ladders or an unbridged creek crossing may require skills that greater fitness cannot replace. Familiarity with route-finding and the ability to recognize unsafe conditions become essential.
The misleading simplicity of a short distance can also influence preparation. A hiker expecting an effortless outing may start late, carry insufficient layers or underestimate the return journey. Those decisions become more consequential when the route enters exposed or remote terrain.
Use distance as one part of the assessment, not the deciding factor. Once terrain difficulty is understood, the next question is whether the trail fits the abilities and experience of everyone participating.
How Can You Choose a Hiking Trail That Matches Your Fitness and Experience?
Choose a hiking trail by assessing your recent activity, comfort with elevation gain and ability to navigate unfamiliar terrain. Compare those abilities with the route’s physical and technical requirements, then verify current conditions before departure. The appropriate trail is one that every group member can complete safely, including the return journey and reasonable unexpected delays.
A practical self-assessment separates physical capacity from wilderness experience. Someone who regularly runs or cycles may have excellent endurance but limited experience with loose rock, changing weather or navigation beyond marked trails.
The following grid is an editorial planning aid, not an official trail-classification system. It helps identify a sensible starting point.
| Assessment | Current experience | Suggested starting point |
|---|---|---|
| Beginning | Limited recent hiking, little climbing experience and reliance on clearly marked paths | Short, maintained trails with modest elevation gain and straightforward navigation |
| Developing | Regular walks or hikes, familiarity with hills and basic map-reading skills | Moderate maintained trails with manageable climbs and known conditions |
| Experienced | Repeated demanding hikes, demonstrated navigation skills and experience managing changing conditions | More demanding routes within proven technical and physical abilities |
Recent experience matters more than an ambitious fitness goal. If your last several outings were short and flat, a major mountain ascent introduces unfamiliar demands even if your general fitness is good.
To assess the route accurately, examine two dimensions separately:
- Physical requirements: Total distance, cumulative elevation gain, sustained steepness, expected duration and pack weight.
- Experience requirements: Navigation, river crossings, unstable terrain, exposure, possible snow and the consequences of losing the trail.
Cross-check trail descriptions against official park information, provincial park advisories and recent trip reports. Official ratings describe general trail characteristics, while current advisories help identify temporary problems. Trip reports can supply useful observations but should never override closures or official safety instructions.
Parks Canada’s hiking preparation recommendations advise beginners to favour shorter trails with little elevation gain. The guidance gives an indicative beginner pace of 2 to 2.5 km per hour on a nature trail, although steep or difficult conditions can substantially reduce progress.
2–2.5 km/h
Indicative beginner hiking speed on a nature trail, according to Parks Canada. This is not a guaranteed speed on mountainous, technical or snow-covered routes.
Parks Canada, How to prepare for a hike.
Build experience through a trail ladder. Start with a familiar, accessible trail, then increase distance on another outing. Once that feels manageable, add elevation gain. Introduce remoteness or more complicated navigation only after developing the necessary skills.
The safest progression is deliberate rather than rushed. With an appropriate route in mind, consider whether the journey belongs in a single day or requires an overnight plan.
Day Hike or Overnight Trip: Which Is Better for Your Next Adventure?
A day hike is usually the more manageable choice when the route can be completed comfortably within available daylight and the group can return without relying on overnight equipment. An overnight trip makes sense when distance, itinerary and camping arrangements justify staying out, provided the group has the necessary equipment, permits and self-sufficiency skills.
The decision should reflect four factors: remoteness, forecast stability, group capability and reservation requirements. Experience matters, but an overnight stay does not automatically make a difficult route safer, just as travelling without camping equipment does not make a remote day hike low-risk.
| Planning factor | Day hike | Overnight trip |
|---|---|---|
| Distance and daylight | Best when a conservative return is achievable before darkness | Allows a route to be divided across days, subject to permitted campsite locations |
| Weather | Less prolonged exposure, but sufficient time is still needed for a safe return | Requires preparation for overnight temperatures and potentially changing conditions |
| Equipment | Safety essentials, navigation, food, water and protective clothing | Additional shelter, sleep system, cooking equipment and food storage |
| Reservations | Trail access rules and any applicable permits | Camping permits, designated sites and potentially advance reservations |
| Self-sufficiency | Ability to manage delays and unexpected emergencies | Ability to camp safely, manage food and water, and respond to overnight problems |
Overnight hiking introduces responsibilities that are easy to overlook. Beyond carrying a tent and sleeping bag, hikers need to plan water treatment, adequate insulation, cooking and food storage. Depending on the route, food may need to be secured in approved lockers, caches or other park-permitted systems.
Reservations can also determine the itinerary. Popular backcountry destinations in Banff and Jasper may require planning well ahead of departure, while Killarney Provincial Park uses Ontario’s provincial park reservation system rather than Parks Canada’s federal booking service.
There is also a less obvious risk with remote day hiking: travelling light can become travelling underprepared. Someone attempting a long wilderness trail without overnight equipment may feel pressure to keep moving despite fatigue or poor conditions, simply because stopping seems impossible.
A useful first-trip question is: Which unexpected situation can the group manage? For a day hike, consider whether everyone can cope with an unexpectedly delayed return. For an overnight trip, consider whether the group can remain safe through poor weather, equipment problems or a disrupted itinerary.
The appropriate response is not to pack a complete camping kit for every day hike. It is to carry appropriate emergency essentials and avoid committing to journeys beyond the group’s demonstrated abilities.
Once the trip format is chosen, departure time becomes a critical planning variable, especially where terrain and limited daylight restrict the margin for error.
Why Can Late Starts Become Dangerous on Remote Hiking Trails?
Late starts can make remote hiking dangerous because they reduce the time available to handle delays, weather changes, navigation mistakes and injuries before darkness. Mountain terrain and dense forests may become difficult to navigate before official sunset. Starting earlier provides a larger safety margin, but a fixed turnaround time is equally important.
A late departure creates several connected problems. The group has less daylight to complete the planned distance, may encounter changing mountain weather later in the day, and has fewer opportunities to respond calmly when progress slows. Rushing can then make decisions and footing less reliable.
In the Canadian Rockies, summer afternoons can bring thunderstorms, while shoulder-season hikes may involve cold temperatures, snow or unexpectedly slippery surfaces. Forecasts must be checked for the particular destination and date; an early start does not make hazardous weather acceptable.
The most practical defence is to establish a turnaround time before departure. Work backwards from the time by which the group should be safely off the trail, rather than treating sunset as the time to begin returning.
Consider this explicitly hypothetical planning example:
Example: Working backwards from daylight
A group plans a mountain day hike on a date when sunset is assumed to be 6:00 p.m. It chooses a 5:00 p.m. latest safe finish to allow for reduced light in the valley and reserves another hour for unexpected delays. If the estimated return from the furthest planned point takes three hours, the resulting turnaround deadline is 1:00 p.m.
These times are hypothetical, not a recommendation for a specific trail. The group must adjust its estimates for actual daylight, terrain, pace, weather, rest stops and the slowest participant. A route with technical sections may take longer to descend than expected.
Sunset also varies considerably across Canada. Northern regions experience pronounced seasonal changes in daylight, and a forested valley may lose useful direct light earlier than an exposed ridge. Short autumn days can leave little flexibility for delays.
Always carry a working headlamp with adequate power and clothing appropriate for the possibility of an unexpected stop. Darkness increases navigation challenges, while falling temperatures can make wet or exhausted hikers more vulnerable.
If darkness arrives unexpectedly, remain together, use navigation tools carefully and avoid improvising a hazardous descent. If onward travel is unsafe, seek a safer location, preserve warmth and use an available emergency communication method. If the group is overdue, the trusted contact should already know the agreed response.
A fixed schedule reduces uncertainty, but timing alone cannot address every changing condition. Hikers also need clear reasons to abandon a route before reaching the intended destination.
When Should You Turn Back During a Hike — and How to Decide Before It Becomes an Emergency?
Turn back when the conditions required for a safe return are no longer present. Warning signs include worsening weather, unexpected fatigue, inadequate daylight, navigation uncertainty, dangerous terrain and missed time checkpoints. Establish these limits before departure so the decision is based on safety rather than disappointment about not reaching the destination.
The most difficult turnaround decision often occurs when a summit, viewpoint or lake appears close. After investing hours in the ascent, hikers may feel that returning without reaching their goal would waste the effort already made.
That reasoning ignores the return journey. Distance already travelled cannot reduce the time, energy or technical ability still required. The relevant question is not how close the destination appears, but whether everyone can return safely under current conditions.
Set go/no-go triggers before starting. These may include:
- Reaching a designated checkpoint later than the planned time.
- Encountering weather that makes exposed terrain unsafe.
- Seeing a group member develop persistent exhaustion, poor coordination or difficulty maintaining a safe pace.
- Discovering an unfamiliar creek crossing, snow-covered section or other obstacle beyond the group’s skills.
- Becoming uncertain about the route or losing confidence in the available navigation information.
A fixed turnaround deadline should remain binding even when the destination seems close. More severe hazards may require an earlier decision, regardless of the schedule.
Group dynamics matter as much as individual judgment. Faster hikers can unintentionally pressure slower members, while a confident leader may underestimate another person’s discomfort. Establish a no-questions-asked turn-back agreement that allows any participant to request a safety reassessment without embarrassment or argument.
Another useful approach is to assign a rotating group member to challenge optimistic assumptions at major decision points. Their role is to ask about time remaining, physical condition, current weather and the consequences of continuing.
Turning back must also be distinguished from choosing the safest immediate response. If the return route itself has become hazardous, rushing downhill may be worse than stopping in a sheltered location and seeking assistance.
Hiking with experienced partners can improve decisions, but only if everyone feels able to communicate concerns. Treating early turnaround as a normal outcome helps develop judgment that becomes increasingly valuable on demanding Canadian wilderness routes.
A successful hike does not require reaching the planned endpoint. It requires making decisions that allow the group to return safely, with enough experience and confidence to choose another adventure.
How Can First-Time Campers Prepare for a National Park Stay (Camping as Part of a Hiking Trip)?
First-time campers can prepare for a Canadian national park stay by booking an appropriate campsite, testing essential equipment, learning food-storage rules and choosing nearby hikes that match their abilities. Frontcountry camping is a practical introduction because vehicle access and shared facilities allow beginners to develop outdoor routines before attempting more remote overnight adventures.
Start by selecting a park with accessible trails and a campground that offers the level of comfort you need. Parks Canada’s Camping 101 information identifies frontcountry camping as suitable for beginners and explains options ranging from conventional campsites to comfort accommodations.
Campground categories make a practical difference:
- Unserviced campsites: Generally lack individual utility hookups, although shared facilities may be available.
- Serviced campsites: Include electricity and may provide additional water or sewer connections.
- Comfort camping: Options such as oTENTiks, yurts or cabins can reduce the amount of camping equipment required.
Check the specific campground rather than assuming all sites provide showers, drinking water, electrical access or cellular connectivity. Reservation availability, operating dates and facilities vary by destination.
For a conventional tent site, consider drainage, shade, exposure to wind and proximity to washrooms. A level, well-drained tent location can improve comfort significantly during wet weather, although site selection must follow campground rules.
Use the first stay to test your sleeping system, learn how to pitch the tent, organize cooking supplies and establish a routine for keeping equipment dry. Practising these skills near your vehicle is more forgiving than learning them kilometres from the trailhead.
Wildlife-safe food storage deserves particular attention. In parks with bear-management requirements, food, scented products, cooking equipment and garbage must be secured according to the site’s instructions. Use designated food lockers or approved storage systems where provided, and never store food inside a sleeping tent.
Food-hanging systems are not interchangeable with certified bear-resistant containers or provided storage facilities. Follow the requirements for the particular campground, rather than assuming a rope and tree branch will provide adequate protection. In frontcountry campgrounds, approved hard-sided vehicle storage may be an option where park rules permit it.
Campground etiquette is another essential skill. Respect quiet hours, manage waste, follow fire restrictions and keep your site clean. Wildlife can be active around campsites, and animals should never be approached or fed.
Finally, prepare for limited connectivity and colder-than-expected nights. Even a campsite a short walk from the car may require a headlamp, insulating layers and a reliable way to organize essential equipment after dark.
Once basic camping routines feel familiar, future hiking trips become easier to organize. The next step is deciding which equipment deserves a permanent place in your kit.
Rent or Buy Your Hiking Gear: Which Is Better for Your First Seasons?
Buying hiking gear makes sense for items used frequently and requiring a personalized fit, while renting or borrowing can be better for expensive equipment needed only occasionally. New Canadian hikers should prioritize comfortable footwear, an appropriately fitted backpack and essential safety items rather than purchasing a complete backcountry kit before gaining experience.
The most useful distinction is between personal-fit equipment and specialized equipment. Footwear and packs must work with your body, while tents and other shared gear can often be tested before committing to ownership.
| Equipment category | Suggested approach | Reason |
|---|---|---|
| Hiking footwear | Usually buy after fitting | Comfort, traction and appropriate fit directly affect performance |
| Daypack or backpack | Fit carefully; consider buying for frequent use | Pack dimensions and load distribution influence comfort |
| Sleeping bag | Rent or borrow initially if suitable | Allows testing of warmth, size and sleeping preferences |
| Backcountry tent | Borrow or rent before buying | Useful for evaluating weight, setup and actual frequency of use |
| Specialized expedition equipment | Rent where available and obtain appropriate training | High cost and limited use may not justify ownership |
| Navigation and emergency essentials | Own and learn to use reliable equipment | Critical items should be familiar and available for each trip |
Fit matters particularly for footwear and backpacks. Hiking shoes or boots should accommodate the foot without excessive movement, provide suitable traction and remain comfortable while walking on uneven terrain. The best choice depends on the trail and conditions, not simply whether the footwear is labelled as a hiking boot.
Backpacks should be assessed with a realistic load. Hip-belt placement, torso length, shoulder straps and overall stability all influence how comfortably a pack carries equipment. A lightweight daypack and a multi-day trekking pack serve different purposes.
Buying the cheapest available version of a frequently used item is not necessarily economical if poor fit makes it uncomfortable or unsuitable. However, a higher price does not guarantee better performance. Try equipment, compare fit and assess actual needs before purchasing.
For expensive items, calculate cost per outing. Divide the net ownership cost by the number of expected uses, taking into account necessary maintenance and any realistic resale value. Compare that result with available rental fees, including transportation and cleaning charges where applicable.
For example, suppose a hypothetical tent costs $400, could later be resold for $200, and is used for ten trips. Its simplified net purchase cost is $200, or $20 per outing, before maintenance and other costs. This is an illustration, not a Canadian market price or rental quote.
Canada’s second-hand outdoor equipment market can also provide opportunities to reduce costs. Inspect used equipment carefully for damage, deterioration and missing components, particularly when its performance has safety implications.
Rental availability varies considerably by community and equipment category. Borrowing from trusted contacts or using a local gear library, where available, can be practical alternatives for occasional camping trips.
Avoid assembling a complete advanced hiking kit before your first outings. Begin with reliable essentials, learn what you actually use and upgrade when experience reveals a genuine requirement.
Equipment choices become more effective when they support a specific itinerary. With a realistic trail, camping experience and suitable gear, the individual planning decisions can be combined into a multi-day trip plan.
Key takeaways before planning a multi-day trip
- Choose the route and campsite network before committing to an itinerary or buying specialized equipment.
- Build the schedule around the group’s realistic pace, overnight conditions and the availability of safe exit options.
- Treat permits, communication arrangements and contingency plans as essential parts of the trip, not administrative details.
How Can You Plan a Successful Multi-Day Hiking and Camping Trip in Canada’s National Parks?
Plan a successful multi-day hiking trip in Canada’s national parks by selecting a route suited to the group, confirming permits and campsites, preparing appropriate equipment, and documenting daily travel and emergency arrangements. A reliable itinerary includes conservative timing, verified trail conditions and contingency options for weather, fatigue or unexpected changes.
Begin with the destination, but evaluate it through the same criteria used for a day hike. Distance, elevation gain, trail conditions and navigation demands must fit everyone in the group, especially when carrying overnight equipment.
National park backcountry trips can require advance campsite reservations and specific permits. Parks Canada’s reservation dates and booking information provides destination-specific schedules and booking instructions.
For the 2026 visitor season, backcountry reservations for Banff, Kootenay and Yoho opened on January 26, 2026, while Jasper backcountry reservations opened on January 28, 2026. These are historical examples of advance booking requirements, not confirmed launch dates for 2027 or later seasons.
After securing the required reservations, build an itinerary around realistic hiking days rather than maximum distances. Identify the intended campground for each night, estimated travel time, access to water, exposed sections and alternative ways to shorten or exit the route.
Check trail advisories, closures, wildlife restrictions and weather forecasts again close to departure. Seasonal access can vary substantially, and a reservation does not guarantee that all surrounding routes will be suitable or accessible.
Leave a detailed trip plan with a trusted person who is not joining the hike. Include the route, campsite locations, participants, expected return time, vehicle location where relevant, and instructions for contacting emergency services if the group fails to return as agreed.
Research the park’s current emergency contact instructions before travelling. Cellular service may be absent in remote areas, so consider an appropriate satellite communication device and ensure you know its limitations and emergency functions. Carry offline navigation resources and the skills to use them; technology should support rather than replace navigation competence.
Food and water require daily planning. Account for drinking water, cooking needs and reliable treatment methods, and verify whether water sources are seasonal or may be unavailable. Appropriate food storage depends on park rules and infrastructure, so confirm approved methods before packing.
Prepare contingencies for each day, such as a shorter route, a safe option to remain at a permitted campsite when conditions deteriorate, or an identifiable exit point. A weather-delay day may be useful where permits and campsite arrangements allow it, but never assume you can occupy an unreserved backcountry site.
Five actions to complete before your Canadian hiking trip
- Verify the route: Record total distance, elevation gain, trail classification, technical obstacles and known exit points on a saved route map.
- Confirm access: Save the required camping reservations, permits, current trail advisories and relevant park rules in an accessible trip folder.
- Prepare equipment: Complete a packed-gear checklist covering shelter, appropriate clothing, navigation, lighting, first aid, food, water treatment and required wildlife-safe storage.
- Document the schedule: Write down each day’s destination, conservative travel estimate, turnaround or reassessment checkpoints and contingency options.
- Share emergency arrangements: Give a trusted contact the complete itinerary, expected return deadline, communication details and agreed instructions for an overdue group.
Before leaving, review the complete plan with everyone participating. Each person should understand the route, expected conditions, important decisions and how the group will respond if the itinerary becomes unsafe.
The best contingency is often an earlier decision: shortening a day, delaying an exposed section or changing the objective while the group still has enough time, energy and resources to do so safely.
Choose a Canadian park or trail that genuinely suits your current abilities, verify its latest requirements and complete the five planning actions before departure. A well-designed hiking trip leaves room for weather changes, unexpected obstacles and the possibility that returning safely matters more than completing every planned kilometre.
How much water should you carry for a hike in Canada?
Parks Canada recommends planning for approximately half a litre of drinking water per hour of hiking. Actual requirements depend on temperature, exertion, individual needs and access to dependable water sources. For longer trips, plan enough carrying capacity and a suitable treatment method rather than assuming natural water is safe to drink untreated.
Can beginners hike in the Canadian Rockies?
Yes. Beginners can enjoy maintained, accessible trails in the Canadian Rockies when routes are appropriate for their abilities and current conditions. Start with shorter walks involving modest elevation gain, check park advisories and weather, and avoid technical scrambling or exposed routes until you have developed the necessary experience.
Is a mobile phone enough for navigation on remote Canadian trails?
No. Cellular coverage is limited or unavailable in many remote Canadian hiking areas. Downloaded maps can help when mobile reception is absent, but devices can run out of power or become damaged. Carry suitable backup navigation tools, know how to use them and consider satellite communication equipment for trips where reliable emergency contact is otherwise unavailable.
What should you do if you encounter a bear while hiking?
Remain calm, avoid approaching the bear and follow the applicable park’s wildlife-safety guidance. Do not run. Bear behaviour and the appropriate response depend on the circumstances and species. In bear country, learn how to carry and use bear spray appropriately, travel with awareness and follow local advisories or closures before setting out.
Do all Canadian national park camping trips require advance reservations?
No. Reservation and permit requirements vary by national park, campground, activity and season. Some popular backcountry campsites require reservations well in advance, while other camping options may operate differently. Check the current rules for the specific park and travel dates, and remember that provincial parks use separate reservation systems.